No edit summary |
No edit summary |
||
| (28 intermediate revisions by 9 users not shown) | |||
| Line 1: | Line 1: | ||
{{CaseNav}} |
{{CaseNav}} |
||
| − | {{New}} |
||
{{CaseInfobox |
{{CaseInfobox |
||
|name = A Pirate's Death for Me |
|name = A Pirate's Death for Me |
||
| − | |image = |
+ | |image = C313Summary.PNG |
|season = [[Cases#Cases in Travel in Time (Season 6)|6]] ([[Travel in Time]]) |
|season = [[Cases#Cases in Travel in Time (Season 6)|6]] ([[Travel in Time]]) |
||
|period = [[:Category:Age of Sail|Age of Sail]] |
|period = [[:Category:Age of Sail|Age of Sail]] |
||
| − | |location = Port Braxton, 1719 |
+ | |location = Port Braxton, [[Wikipedia:West Indies|West Indies, 1719]] |
|casenumber = 22 |
|casenumber = 22 |
||
|datereleased = 8th August 2019 |
|datereleased = 8th August 2019 |
||
|partner = [[Jack Archer]] (All Chapters)<br />[[Zara Tien]] (1 task in Chapter 1)<br />[[Orlando Ordelaffi]] ([[Additional Investigation|Sink or Swim 2]])<br />[[Mary Read]] (1 task in Sink or Swim 2) |
|partner = [[Jack Archer]] (All Chapters)<br />[[Zara Tien]] (1 task in Chapter 1)<br />[[Orlando Ordelaffi]] ([[Additional Investigation|Sink or Swim 2]])<br />[[Mary Read]] (1 task in Sink or Swim 2) |
||
|preceededby = [[Anchors Aweigh!]] |
|preceededby = [[Anchors Aweigh!]] |
||
| − | |succeededby = |
+ | |succeededby = [[Shipwrecked!]] |
}} |
}} |
||
'''A Pirate's Death for Me''' is a [[Cases|case]] featured in ''[[Criminal Case]]'' as the twenty-second case of [[Travel in Time]] (Season 6) and the three-hundred thirteenth case overall. It takes place in [[:Category:Age of Sail|Age of Sail]]. |
'''A Pirate's Death for Me''' is a [[Cases|case]] featured in ''[[Criminal Case]]'' as the twenty-second case of [[Travel in Time]] (Season 6) and the three-hundred thirteenth case overall. It takes place in [[:Category:Age of Sail|Age of Sail]]. |
||
| Line 22: | Line 21: | ||
Lincoln said that he had overheard Blackbeard finding the map to Rackham's lost treasure. Knowing that he was telling the truth, Lincoln planned to steal the map from Blackbeard's pocket and kill him afterwards. He executed the plan, injecting poison into an orange which he gave to Blackbeard after the latter ordered a drink. Refusing to disclose the treasure's location, Lincoln was handed over to the authorities. |
Lincoln said that he had overheard Blackbeard finding the map to Rackham's lost treasure. Knowing that he was telling the truth, Lincoln planned to steal the map from Blackbeard's pocket and kill him afterwards. He executed the plan, injecting poison into an orange which he gave to Blackbeard after the latter ordered a drink. Refusing to disclose the treasure's location, Lincoln was handed over to the authorities. |
||
| − | Post-arrest, [[Captain Shadrach]] said that he had heard that the Egyptian Trading Company was planning to bet at least twice the amount that the East India Company were willing to bet in the Tortuga auction. To procure more fortune to beat the Egyptians, the team interrogated Lincoln about the treasure. After Lincoln slipped up that he had hidden the map in a peg leg, the team found the map in the tavern, which they sent to [[Penelope Sage|Penelope]] to decode. After the treasure's location was successfully pinpointed, Shadrach said that it was in an island lying in extremely treacherous waters, but that they were willing to take the risk to win the auction. |
+ | Post-arrest, [[Ellis Shadrach|Captain Shadrach]] said that he had heard that the Egyptian Trading Company was planning to bet at least twice the amount that the East India Company were willing to bet in the Tortuga auction. To procure more fortune to beat the Egyptians, the team interrogated Lincoln about the treasure. After Lincoln slipped up that he had hidden the map in a peg leg, the team found the map in the tavern, which they sent to [[Penelope Sage|Penelope]] to decode. After the treasure's location was successfully pinpointed, Shadrach said that it was in an island lying in extremely treacherous waters, but that they were willing to take the risk to win the auction. |
| − | Meanwhile, Orlando and the player determined that Blackbeard had named Mary Read as his heir to his ship, and successfully convinced the ship's crew to accept her as their captain. After all the events, the team traveled to the island, only for the ship to crash. |
+ | Meanwhile, Orlando and the player determined that Blackbeard had named Mary Read as his heir to his ship, and successfully convinced the ship's crew to accept her as their captain. After all the events, the team traveled to the island, only for the ship to [[Shipwrecked!|crash]]. |
==Summary== |
==Summary== |
||
| Line 37: | Line 36: | ||
==[[:Category:Suspects|Suspects]]== |
==[[:Category:Suspects|Suspects]]== |
||
| − | {{Soon to be Added}} |
||
<gallery position="center"> |
<gallery position="center"> |
||
| + | C313P1.png|[[Lincoln Matuszak]] |
||
| + | C313P2.png|[[Rags]] |
||
| + | C313P3.png|[[Ezola Alldred]] |
||
| + | C313P4.png|[[Mary Read]] |
||
| + | C313P5.png|[[Captain Shafra]] |
||
</gallery> |
</gallery> |
||
==[[:Category:Quasi-suspects|Quasi-suspect(s)]]== |
==[[:Category:Quasi-suspects|Quasi-suspect(s)]]== |
||
| − | {{Soon to be Added}} |
||
<gallery position="center"> |
<gallery position="center"> |
||
| + | C313PQ1.png|[[Ellis Shadrach|Captain Shadrach]] |
||
</gallery> |
</gallery> |
||
==[[Killer's Profile]]== |
==[[Killer's Profile]]== |
||
| − | {{Under Construction}} |
||
*The killer drinks rum. |
*The killer drinks rum. |
||
*The killer plays Liar's Dice. |
*The killer plays Liar's Dice. |
||
*The killer sings sea shanties. |
*The killer sings sea shanties. |
||
| − | *The killer wears gold |
+ | *The killer wears a gold earring. |
*The killer has a scar. |
*The killer has a scar. |
||
| + | [[File:C313KP.PNG|center|border|666px]] |
||
==[[Crime Scenes]]== |
==[[Crime Scenes]]== |
||
| − | {{Soon to be Added}} |
||
<gallery position="center" columns="2" widths="250"> |
<gallery position="center" columns="2" widths="250"> |
||
| + | C313CS1A.jpg|Pirate Tavern |
||
| + | C313CS1B.jpg|Tavern Table |
||
| + | C313CS2A.jpg|Fruit Market |
||
| + | C313CS2B.jpg|Market Stall |
||
| + | C313CS3A.jpg|Blackbeard's Quarters |
||
| + | C313CS3B.jpg|Blackbeard's Desk |
||
</gallery> |
</gallery> |
||
==Steps== |
==Steps== |
||
| − | {{Under Construction}} |
||
===Chapter 1=== |
===Chapter 1=== |
||
| + | [[File:C313C1.PNG|506x146px|border]] |
||
*Investigate Pirate Tavern. ([[Evidence|Clues]]: Broken Mug, Junk Pile, Victim's Body; Murder Weapon registered: Poisoned Orange; Victim identified: Blackbeard) |
*Investigate Pirate Tavern. ([[Evidence|Clues]]: Broken Mug, Junk Pile, Victim's Body; Murder Weapon registered: Poisoned Orange; Victim identified: Blackbeard) |
||
*Examine Broken Mug. (Result: Victim's Mug; New Suspect: Lincoln Matuszak) |
*Examine Broken Mug. (Result: Victim's Mug; New Suspect: Lincoln Matuszak) |
||
| Line 76: | Line 84: | ||
===Chapter 2=== |
===Chapter 2=== |
||
| + | [[File:C313C2.PNG|506x146px|border]] |
||
*Investigate Blackbeard's Quarters. (Available after unlocking Chapter 2; Clues: Drawer, Compass, Wanted Poster) |
*Investigate Blackbeard's Quarters. (Available after unlocking Chapter 2; Clues: Drawer, Compass, Wanted Poster) |
||
*Examine Drawer. (Result: Poem) |
*Examine Drawer. (Result: Poem) |
||
*Analyze Poem. (12:00:00; Attribute: The killer sings sea shanties; New Crime Scene Unlocked: Tavern Table) |
*Analyze Poem. (12:00:00; Attribute: The killer sings sea shanties; New Crime Scene Unlocked: Tavern Table) |
||
*Investigate Tavern Table. (Prerequisite: Poem analyzed; Clues: Locked Box, Broken Board) |
*Investigate Tavern Table. (Prerequisite: Poem analyzed; Clues: Locked Box, Broken Board) |
||
| − | *Examine Locked Box. (Result: ) |
+ | *Examine Locked Box. (Result: Blackbeard's Gold) |
| + | *Analyze Blackbeard's Gold. (12:00:00) |
||
| + | *Question Rags about Blackbeard's gold. (Prerequisite: Blackbeard's Gold analyzed; Profile updated: Rags drinks rum) |
||
*Examine Broken Board. (Result: Tavern Menu) |
*Examine Broken Board. (Result: Tavern Menu) |
||
*Confront Lincoln Matuszak about exploiting Blackbeard's murder. (Prerequisite: Tavern Menu restored; Profile updated: Lincoln drinks rum, plays Liar's Dice and sings sea shanties) |
*Confront Lincoln Matuszak about exploiting Blackbeard's murder. (Prerequisite: Tavern Menu restored; Profile updated: Lincoln drinks rum, plays Liar's Dice and sings sea shanties) |
||
| Line 87: | Line 98: | ||
*Examine Wanted Poster. (New Suspect: Mary Read) |
*Examine Wanted Poster. (New Suspect: Mary Read) |
||
*Ask Mary Read about her rivalry with Blackbeard. (Prerequisite: Mary Read identified; Profile updated: Mary drinks rum and plays Liar's Dice) |
*Ask Mary Read about her rivalry with Blackbeard. (Prerequisite: Mary Read identified; Profile updated: Mary drinks rum and plays Liar's Dice) |
||
| − | *Go to Chapter 3. |
+ | *Go to Chapter 3. (1 star) |
===Chapter 3=== |
===Chapter 3=== |
||
| + | [[File:C313C3.PNG|506x146px|border]] |
||
| + | *Investigate Blackbeard's Desk. (Available after unlocking Chapter 3; Clues: Flowers, Dead Albatross, Gun Case) |
||
| + | *Examine Flowers. (Result: Flower Card) |
||
| + | *Ask Ezola Alldred about her romantic relationship with the victim. (Prerequisite: Flower Card unraveled; Profile updated: Ezola plays Liar's Dice and sings sea shanties) |
||
| + | *Examine Dead Albatross. (Result: Red Strands) |
||
| + | *Examine Red Strands. (Result: Saffron) |
||
| + | *Confront Captain Shafra about the dead albatross. (Prerequisite: Saffron identified under microscope; Profile updated: Shafra plays Liar's Dice and sings sea shanties) |
||
| + | *Examine Gun Case. (Result: Gun Case) |
||
| + | *Analyze Gun Case. (09:00:00) |
||
| + | *Find out whether Mary Read was going to fight a duel with Blackbeard. (Prerequisite: Gun Case analyzed; Profile updated: Mary sings sea shanties) |
||
| + | *Investigate Market Stall. (All tasks before must be done first; Clues: Poison Bottle, Fruit Sack) |
||
| + | *Examine Poison Bottle. (Result: Creamy Substance) |
||
| + | *Analyze Creamy Substance. (09:00:00; Attribute: The killer has a scar) |
||
| + | *Examine Fruit Sack. (Result: Syringe) |
||
| + | *Analyze Syringe. (15:00:00; Attribute: The killer wears a gold earring) |
||
*Take care of the killer now! |
*Take care of the killer now! |
||
| − | *Go to [[Additional Investigation|Sink or Swim (2/5)]]. |
+ | *Go to [[Additional Investigation|Sink or Swim (2/5)]]. (No stars) |
===Sink or Swim (2/5)=== |
===Sink or Swim (2/5)=== |
||
[[File:TiTAI5.PNG|506x146px|border]] |
[[File:TiTAI5.PNG|506x146px|border]] |
||
| + | *Speak with Captain Shadrach about hunting the treasure. (Available after unlocking Sink or Swim; Reward: '''20,000 [[Coins]]''') |
||
| ⚫ | |||
| + | *Ask Lincoln Matuszak where the treasure map is. (Prerequisite: Shadrach interrogated) |
||
| + | *Investigate Pirate Tavern. (Prerequisite: Lincoln interrogated; Clue: Peg Leg) |
||
| + | *Examine Peg Leg. (Result: Blank Map) |
||
| + | *Analyze Blank Map. (06:00:00) |
||
| + | *Show Captain Shadrach the treasure map. (Prerequisite: Blank Map analyzed; Reward: '''Spyglass''') |
||
| + | *Investigate Blackbeard's Quarters. (Available after unlocking Sink or Swim; Clue: Torn Paper) |
||
| + | *Examine Torn Paper. (Result: Ship Ownership Deed) |
||
| + | *Analyze Ship Ownership Deed. (09:00:00) |
||
| + | *Nominate Mary Read as the ''Black Sparrow''<nowiki>'</nowiki>s new captain. (Prerequisite: Ship Ownership Deed analyzed; Reward: '''[[Snacks|Burger]]''') |
||
| + | *Investigate Fruit Market. (Prerequisite: Mary interrogated; Clue: Bottle) |
||
| + | *Examine Bottle. (Result: Bottle Label) |
||
| + | *Accompany Mary Read to inform Rags of her new command. (Prerequisite: Bottle Label unraveled) |
||
| ⚫ | |||
==Trivia== |
==Trivia== |
||
*The title of the case is a reference to the song "[[Wikipedia:Yo Ho (A Pirate's Life for Me)|A Pirate's Life for Me]]". |
*The title of the case is a reference to the song "[[Wikipedia:Yo Ho (A Pirate's Life for Me)|A Pirate's Life for Me]]". |
||
*This case is one of the cases in which the killer has to be interrogated once again during the Additional Investigation. |
*This case is one of the cases in which the killer has to be interrogated once again during the Additional Investigation. |
||
| + | *In Chapter 1 and Sink or Swim, [[Wikipedia:Louis XV of France|Louis XV]] is mentioned. |
||
| − | *This is the one of two cases in Travel in Time in which neither the victim nor the suspects make an appearance before or after the case, along with [[Pride Comes Before the Fall]]. |
||
| + | *In Chapter 2, the song ''Leave Her, Johnny'' is mentioned. |
||
| − | **This is one of only six such cases in the game thus far (barring the introductory cases), along with the aforementioned cases, [[Death by Crucifixion]], [[Deadly Legacy]], [[Shadow Nation]] and [[Lifeless in Seattle]]. |
||
| + | *In Chapter 3, the film ''[[Wikipedia:The Godfather|The Godfather]]'' is mentioned. |
||
==Navigation== |
==Navigation== |
||
Revision as of 03:49, 8 December 2019
| ◄ | General | ► |
A Pirate's Death for Me is a case featured in Criminal Case as the twenty-second case of Travel in Time (Season 6) and the three-hundred thirteenth case overall. It takes place in Age of Sail.
Plot
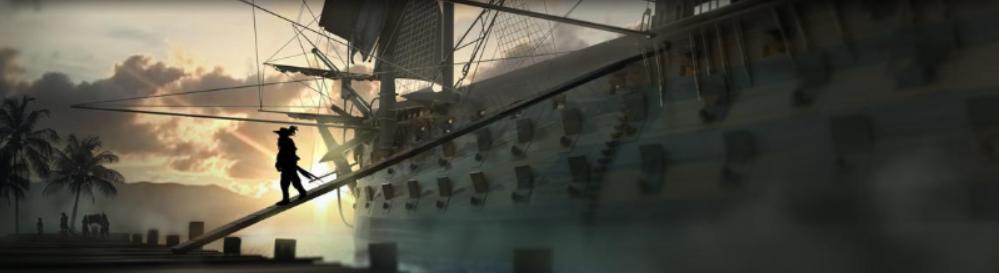
A week after disembarking from Cape Verde, the HMS Highmore docked in Port Braxton to restock on supplies. In a nearby tavern, Blackbeard approached Jack and the player to befriend them. The team then watched as Blackbeard collapsed dead after he had realized that the orange he ate was poisoned.
Mid-investigation, Orlando accidentally fell into the water while exploring the Black Sparrow. Later, pirates Mary Read and Rags started fighting over captaincy of the Black Sparrow. The team then found enough evidence to arrest tavern owner Lincoln Matuszak for the murder.
Lincoln said that he had overheard Blackbeard finding the map to Rackham's lost treasure. Knowing that he was telling the truth, Lincoln planned to steal the map from Blackbeard's pocket and kill him afterwards. He executed the plan, injecting poison into an orange which he gave to Blackbeard after the latter ordered a drink. Refusing to disclose the treasure's location, Lincoln was handed over to the authorities.
Post-arrest, Captain Shadrach said that he had heard that the Egyptian Trading Company was planning to bet at least twice the amount that the East India Company were willing to bet in the Tortuga auction. To procure more fortune to beat the Egyptians, the team interrogated Lincoln about the treasure. After Lincoln slipped up that he had hidden the map in a peg leg, the team found the map in the tavern, which they sent to Penelope to decode. After the treasure's location was successfully pinpointed, Shadrach said that it was in an island lying in extremely treacherous waters, but that they were willing to take the risk to win the auction.
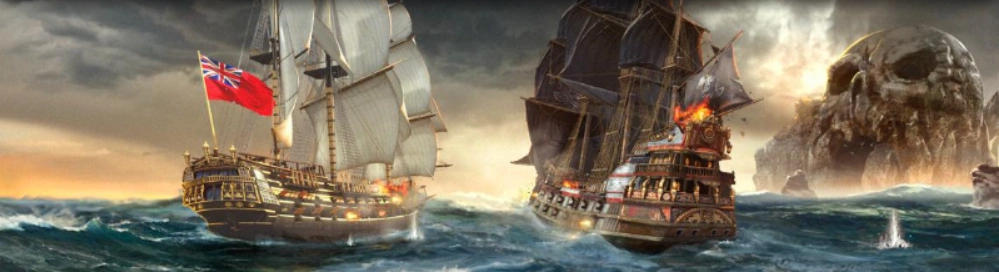
Meanwhile, Orlando and the player determined that Blackbeard had named Mary Read as his heir to his ship, and successfully convinced the ship's crew to accept her as their captain. After all the events, the team traveled to the island, only for the ship to crash.
Summary
Victim
- Blackbeard (dropped dead after eating a poisoned orange)
Murder Weapon
- Poisoned Orange
Killer
- Lincoln Matuszak
Suspects
")
")
")
")
")
Quasi-suspect(s)
")
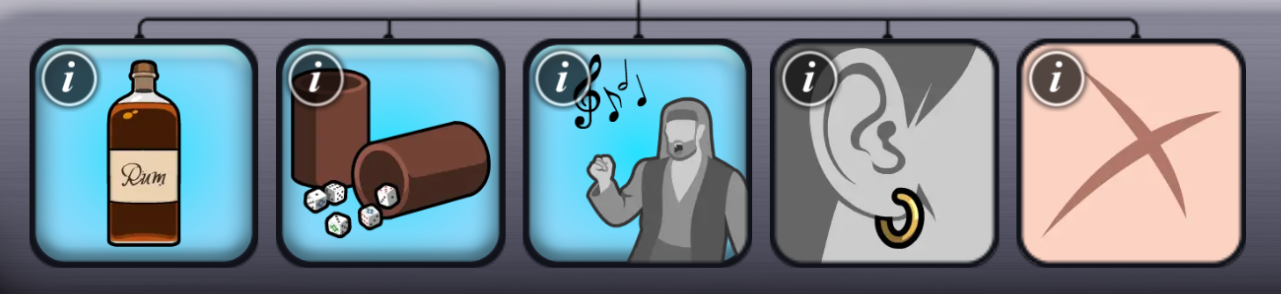
Killer's Profile
- The killer drinks rum.
- The killer plays Liar's Dice.
- The killer sings sea shanties.
- The killer wears a gold earring.
- The killer has a scar.
Crime Scenes
")
")
")
")
")
")
Steps
Chapter 1

- Investigate Pirate Tavern. (Clues: Broken Mug, Junk Pile, Victim's Body; Murder Weapon registered: Poisoned Orange; Victim identified: Blackbeard)
- Examine Broken Mug. (Result: Victim's Mug; New Suspect: Lincoln Matuszak)
- Question Lincoln Matuszak about the murder. (Prerequisite: Victim's Mug restored; New Crime Scene Unlocked: Fruit Market)
- Investigate Fruit Market. (Prerequisite: Lincoln interrogated; Clues: Scuffed Paper, Locked Crate)
- Examine Scuffed Paper. (Result: Poison Drawing)
- Analyze Poison Drawing. (03:00:00; Attribute: The killer plays Liar's Dice)
- Examine Locked Crate. (Result: Crate of Oranges; New Suspect: Ezola Alldred)
- Ask Ezola Alldred if she remembers selling any oranges. (Prerequisite: Crate of Oranges unlocked)
- Examine Junk Pile. (Result: Wooden Eye; New Suspect: Rags)
- Find out whether Rags knows who might've murdered his captain. (Prerequisite: Wooden Eye found)
- Autopsy Victim's Body. (18:00:00; Attribute: The killer drinks rum)
- Go to Chapter 2. (No stars)
Chapter 2
- Investigate Blackbeard's Quarters. (Available after unlocking Chapter 2; Clues: Drawer, Compass, Wanted Poster)
- Examine Drawer. (Result: Poem)
- Analyze Poem. (12:00:00; Attribute: The killer sings sea shanties; New Crime Scene Unlocked: Tavern Table)
- Investigate Tavern Table. (Prerequisite: Poem analyzed; Clues: Locked Box, Broken Board)
- Examine Locked Box. (Result: Blackbeard's Gold)
- Analyze Blackbeard's Gold. (12:00:00)
- Question Rags about Blackbeard's gold. (Prerequisite: Blackbeard's Gold analyzed; Profile updated: Rags drinks rum)
- Examine Broken Board. (Result: Tavern Menu)
- Confront Lincoln Matuszak about exploiting Blackbeard's murder. (Prerequisite: Tavern Menu restored; Profile updated: Lincoln drinks rum, plays Liar's Dice and sings sea shanties)
- Examine Compass. (Result: Compass Engraving; New Suspect: Captain Shafra)
- Find out what Captain Shafra's compass is doing on the Black Sparrow. (Prerequisite: Compass Engraving unraveled; Profile updated: Shafra drinks rum)
- Examine Wanted Poster. (New Suspect: Mary Read)
- Ask Mary Read about her rivalry with Blackbeard. (Prerequisite: Mary Read identified; Profile updated: Mary drinks rum and plays Liar's Dice)
- Go to Chapter 3. (1 star)
Chapter 3

- Investigate Blackbeard's Desk. (Available after unlocking Chapter 3; Clues: Flowers, Dead Albatross, Gun Case)
- Examine Flowers. (Result: Flower Card)
- Ask Ezola Alldred about her romantic relationship with the victim. (Prerequisite: Flower Card unraveled; Profile updated: Ezola plays Liar's Dice and sings sea shanties)
- Examine Dead Albatross. (Result: Red Strands)
- Examine Red Strands. (Result: Saffron)
- Confront Captain Shafra about the dead albatross. (Prerequisite: Saffron identified under microscope; Profile updated: Shafra plays Liar's Dice and sings sea shanties)
- Examine Gun Case. (Result: Gun Case)
- Analyze Gun Case. (09:00:00)
- Find out whether Mary Read was going to fight a duel with Blackbeard. (Prerequisite: Gun Case analyzed; Profile updated: Mary sings sea shanties)
- Investigate Market Stall. (All tasks before must be done first; Clues: Poison Bottle, Fruit Sack)
- Examine Poison Bottle. (Result: Creamy Substance)
- Analyze Creamy Substance. (09:00:00; Attribute: The killer has a scar)
- Examine Fruit Sack. (Result: Syringe)
- Analyze Syringe. (15:00:00; Attribute: The killer wears a gold earring)
- Take care of the killer now!
- Go to Sink or Swim (2/5). (No stars)
Sink or Swim (2/5)
- Speak with Captain Shadrach about hunting the treasure. (Available after unlocking Sink or Swim; Reward: 20,000 Coins)
- Ask Lincoln Matuszak where the treasure map is. (Prerequisite: Shadrach interrogated)
- Investigate Pirate Tavern. (Prerequisite: Lincoln interrogated; Clue: Peg Leg)
- Examine Peg Leg. (Result: Blank Map)
- Analyze Blank Map. (06:00:00)
- Show Captain Shadrach the treasure map. (Prerequisite: Blank Map analyzed; Reward: Spyglass)
- Investigate Blackbeard's Quarters. (Available after unlocking Sink or Swim; Clue: Torn Paper)
- Examine Torn Paper. (Result: Ship Ownership Deed)
- Analyze Ship Ownership Deed. (09:00:00)
- Nominate Mary Read as the Black Sparrow's new captain. (Prerequisite: Ship Ownership Deed analyzed; Reward: Burger)
- Investigate Fruit Market. (Prerequisite: Mary interrogated; Clue: Bottle)
- Examine Bottle. (Result: Bottle Label)
- Accompany Mary Read to inform Rags of her new command. (Prerequisite: Bottle Label unraveled)
- Move on to a new crime! (1 star)
Trivia
- The title of the case is a reference to the song "A Pirate's Life for Me".
- This case is one of the cases in which the killer has to be interrogated once again during the Additional Investigation.
- In Chapter 1 and Sink or Swim, Louis XV is mentioned.
- In Chapter 2, the song Leave Her, Johnny is mentioned.
- In Chapter 3, the film The Godfather is mentioned.